


A burst pipe can cause extensive damage in minutes. Water pours through walls, pools across floors, and saturates insulation before most homeowners even realize what happened. If you live in Bellevue or anywhere in the Greater Seattle area, this guide walks you through every step: stopping the water, applying a temporary fix, and getting a permanent repair done right.
Key Takeaways
- A burst pipe is a plumbing emergency. Immediately shut off the main water valve, kill power in wet areas, and call a licensed plumber like Ready Rooter Washington, which offers 24/7 service across Bellevue and Puget Sound.
- Temporary fixes such as duct tape, pipe repair tape, epoxy putty, and rubber plus hose clamp patches only buy time until professional burst pipe repair is completed.
- Common local causes of pipe bursts in the Seattle area include freezing temperatures during cold snaps, aging copper pipe, high water pressure from the municipal supply, and shifting clay soils.
- Permanent repair usually involves cutting out the damaged section and replacing it with new copper, PEX, or PVC pipe, often preceded by camera inspection and followed by pressure testing.
- Document all damage with photos and videos for insurance. Ready Rooter Washington provides detailed invoices, repair reports, and documentation to support claims, plus long-term solutions like whole house repiping and pressure reducing valve installation.
What to Do Immediately When a Pipe Bursts
Acting quickly is critical to minimize water damage from a burst pipe. Every second counts. Here is a response checklist in the order you should follow it:
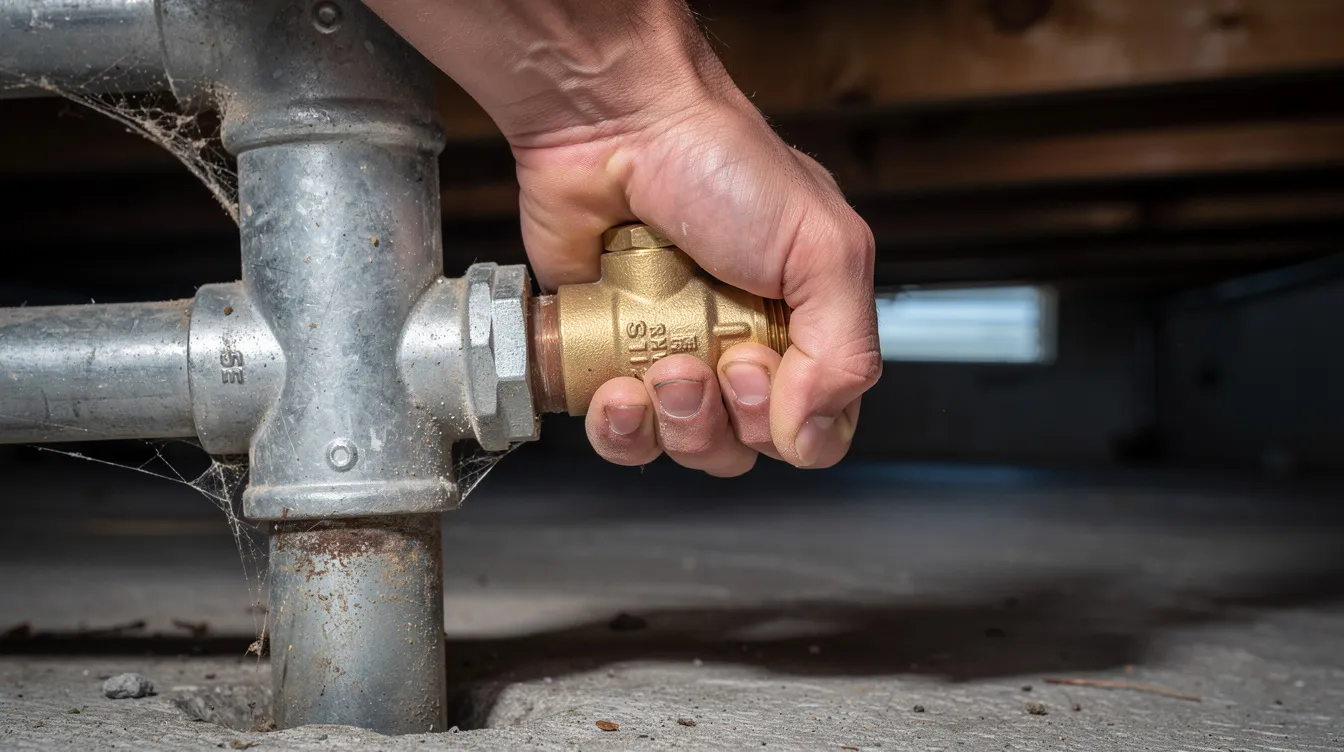
- Shut off the main water supply. Locate your main water valve (typically near the water meter, in a crawlspace, garage, or where the service line enters the foundation) and turn it off. This stops water flow to the entire house.
- Open faucets to drain the system. Opening faucets drains remaining water and relieves pressure on the plumbing system. Start with the faucets closest to the burst, then open others throughout the house.
- Turn off electricity in affected areas. Water reaching outlets, appliances, or your electrical panel creates shock and fire risk. Flip the appropriate breakers at the panel. If you cannot safely reach the panel, call your utility or 911.
- Move valuables away from the water path. Furniture, electronics, documents, and irreplaceable items should be relocated to dry areas as fast as possible.
- Call emergency plumbing services. Contact a local plumber like Ready Rooter Washington right away, especially if the burst water pipe is inside a wall, underground, or you cannot identify the source. Professional plumbers can respond within 1 to 2 hours for emergencies.
- If you cannot find the shut-off valve, call the plumber first. A good emergency plumbing dispatcher can talk you through locating the valve over the phone while a technician is already en route.
How to Temporarily Fix a Burst Pipe Until Help Arrives
These methods are stop-gap measures only, not permanent burst pipe repair. They work best on minor cracks or a pinhole leak in an accessible section of pipe. If the break is large or on a main line, keep the main valve shut and wait for a professional plumber.
Rubber pipe clamps and epoxy putty are temporary fixes for burst pipes. Here are the most common options, ranked roughly by reliability:
- Rubber pad plus hose clamps. Cut a piece of rubber sheeting (an old inner tube works) large enough to wrap around the damaged pipe. Secure it with two or more hose clamps tightened over the crack. This holds better than tape alone.
- Epoxy putty. Epoxy putty hardens in minutes for quick pipe sealing. Knead the two-part putty, press it over the crack on a dry surface, and let it cure before slowly restoring pressure. Plumber’s putty is a different product; epoxy putty is what you need here.
- Self-fusing silicone repair tape. Stretches and bonds to itself, creating a watertight wrap. Better than standard tape but still temporary.
- Duct tape. Duct tape can temporarily stop minor leaks but is not ideal. It holds for a few hours at best and only on low-pressure drips.
Before applying any patch, thoroughly dry the damaged section with towels and, if safe, a hair dryer on a low setting. Adhesion fails on wet surfaces.
Temporary repairs can buy time until a permanent solution is implemented. Keep the main water valve closed and only briefly turn it on to test the patch if you absolutely need water. If the pipe was severely damaged, do not restore pressure at all.
Recognizing the Signs of a Burst or Broken Pipe
Not every burst pipe announces itself with a fountain of water. Many failures happen inside walls, below floors, or underground. Knowing the signs helps you detect the problem before the damage spreads.
Visible signs:
- Water spraying or pooling on floors
- Bulging or discolored drywall
- Sagging ceilings or water stains
- Peeling paint or bubbling wallpaper
Subtle indicators:
- A sudden drop in water pressure at multiple fixtures
- An unexpectedly high water bill with no change in usage
- Hissing or rushing sounds inside walls when all faucets are off
Hidden damage clues:
- Musty odors or visible mold growth on walls, baseboards, or ceilings
- Warm or cold spots on floors and walls that were not there before
- Outdoor puddles, constantly damp soil, or water flowing at the curb near your property, which can signal an underground leak or main water service failure
If any of these symptoms appear, locate your main valve and be ready to shut it off while you investigate further.
Common Causes of Burst Pipes in the Seattle & Bellevue Area
Western Washington’s maritime climate, older housing stock, and variable municipal water pressure create specific risk factors for pipe bursts. Here are the most common causes in this region.
Freezing temperatures. Though Seattle rarely sees prolonged freezes, cold snaps do happen. In January 2023, a severe freeze across Washington State caused widespread frozen pipe failures; the State Fire Marshal recorded 95 incidents at assisted living and nursing homes alone. Ice expands water volume by about 9%, generating enough pressure to crack copper, PVC, and even PEX if water has no room to move. Pipes in uninsulated crawlspaces, exterior walls, and garages are the most vulnerable areas.
Corroded and aged metal pipes. Corrosion weakens metal pipes over time. Homes built in the 1960s through 1990s often have original copper supply lines or galvanized steel. Decades of mineral contact, pH fluctuations, and electrolysis cause pitting, thinning, and pinhole leaks that eventually progress to full rupture. Severe damage may include heavily corroded or multiple weak areas in pipes that need section or whole-house replacement.
Excessive water pressure. Typical residential water pressure in Seattle homes runs 60 to 75 psi. In some elevation zones, static pressure from the municipal supply exceeds 80 psi. Excessive water pressure can lead to pipe bursts, especially at joints and fittings. A missing or failing pressure reducing valve compounds the problem over years.
Soil movement. Puget Sound clay soils expand and contract with moisture content. Heavy rain, saturated hillsides, and seasonal shifts put torsional stress on buried water and sewer lines, cracking joints and pipe walls.
Other factors. Clogged pipes can create pressure buildup and cause bursts. Tree root intrusion can damage underground pipes, particularly older clay or cast-iron sewer laterals. Poor installation, unprotected pipes in unheated areas, and past DIY repairs with incorrect fittings or solder also raise the risk of a break.
Safety First: Water, Electricity, and Structural Risks
Before you attempt any repair, run through this safety checklist.
- Electricity and water do not mix. Standing water near outlets, power strips, or major appliances requires shutting off the appropriate breakers at the electrical panel. If the panel itself is in a flooded area, do not approach it; call your utility company instead.
- Flooded basements and crawlspaces. Do not wade into deeply flooded spaces without confirming power is off and the structure is sound. Water-saturated soil under a foundation can shift, and water-logged floor joists can weaken.
- Slipping hazards. Wet stairs and tile are treacherous. Wear non-slip shoes and move carefully when carrying tools or buckets.
- Gas appliances. If you smell gas or suspect water has reached a gas appliance (furnace, water heater, dryer), shut off the gas supply and call your utility or fire department.
Taking a few minutes to secure the area prevents injuries that are far more costly than any plumbing repair.
How to Locate the Main Water Shut-Off Valve in Puget Sound Homes
Finding the valve before a plumbing emergency saves both time and damage. Here is where to look in Greater Seattle homes:
| Home type | Common valve location |
|---|---|
| Single-family on slab | Utility room, garage wall, or near the front hose bib |
| Single-family with crawlspace | Inside the crawlspace near the foundation wall facing the street |
| Homes with basements | Basement wall near the water heater or where the main enters |
| Condos / multi-family | Individual unit shut-off inside a utility closet, plus a building main valve in a shared mechanical room |
| The outdoor meter box near the sidewalk also has a shut-off, but it often requires a meter key tool. The indoor main valve is your fastest option. |
Once you locate it, label it with a permanent marker or bright tag. Show every household member how to turn it. A gate valve turns clockwise to close; a ball valve needs a quarter turn so the handle is perpendicular to the pipe.
Tools and Materials for DIY Burst Pipe Repair
If you plan to attempt a small, accessible repair yourself, gather the following before you start.
Essential tools:
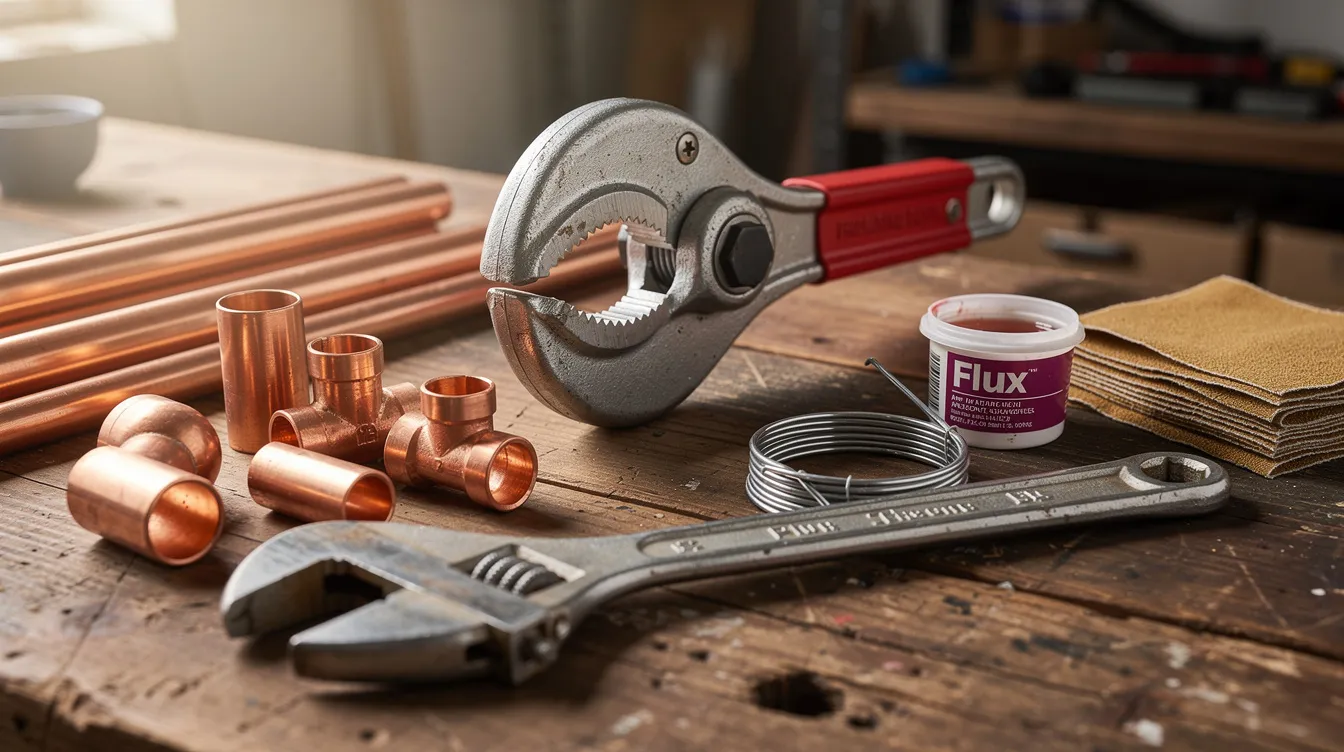
- Pipe cutter (sized for your pipe diameter)
- Adjustable wrench
- Deburring tool or steel wool
- Measuring tape
- Bucket and rags
- Work light (headlamp or clamp light)
- Safety glasses
Materials for copper pipe repair:
- Replacement copper pipe of the appropriate size (1/2″ or 3/4″ are most common)
- Copper couplings or repair sleeves
- Plumber’s flux (ASTM B813 compliant)
- Lead-free solder (ASTM B32 compliant)
- Emery cloth for surface prep
Push-to-connect option:
- Push-fit fittings (such as SharkBite-style) for copper, PEX, or CPVC. Verify the pipe end diameter matches the fitting size before purchasing.
Temporary fix supplies:
- Pipe repair tape or self-fusing silicone tape
- Rubber sheeting, hose clamps
- Epoxy putty rated for potable water
Professional plumbers like Ready Rooter Washington arrive with specialized tools that go beyond this list: pipe thawing equipment, camera inspection gear for leak detection inside walls and underground, and hydro-jetting machines if drain blockages contributed to the problem, providing comprehensive plumbing, drain, and sewer services in Bellevue.
Step-by-Step: How to Fix a Burst Copper Pipe Permanently
This section walks through a permanent repair on an exposed copper supply line. If the damaged section is inside a wall, underground, or near combustible materials, call a licensed plumber instead.
1. Prepare the work area. Shut off the main water valve. Open nearby faucets to drain remaining water and relieve pressure. If the pipe froze, let it thaw fully before cutting. Pouring warm (not boiling) water over towels wrapped around the frozen section speeds the process safely.
2. Mark and cut. Measure at least one inch beyond the visible damage on each side. Use a pipe cutter to cut out the damaged section. Keep both cuts straight and square; angled cuts prevent fittings from seating correctly.
3. Deburr and clean. Remove burrs from the inside of each pipe end with a deburring tool or the blade on your pipe cutter. Use emery cloth or steel wool to polish the outside of both pipe ends and the inside of each copper coupling until the surfaces are bright and shiny. Oils, oxidation, or dirt will prevent solder from bonding.
4. Dry-fit the replacement pipe. Cut a new pipe segment to span the gap plus the depth of both couplings. Slide the couplings and replacement pipe into place dry to confirm the fit. Mark insertion depths with a marker.
5. Apply flux and assemble. Brush a thin, even coat of plumber’s flux on the outside of each pipe end and the inside of each fitting. Reassemble the replacement section with the couplings.
6. Solder the joints. Heat the fitting (not the solder) with a propane torch. When the flux sizzles, touch lead-free solder to the joint where the pipe meets the fitting. Capillary action pulls the solder around the full circumference. A complete ring of solder at the joint edge means the connection is sealed. Let the joint cool naturally; do not quench it with water.
7. Test. Close all open faucets. Turn the main water valve on slowly. Check every joint for drips under full pressure. If any joint weeps, drain the line, re-flux, and re-solder that connection.
If you are not comfortable with open-flame soldering or the repair is in a confined space, push-fit fittings or a call to Ready Rooter Washington are safer options.
Using Push-to-Connect Fittings to Fix a Broken Pipe
Push-fit fittings allow easy repairs without soldering or open flame. They are a practical alternative for handy homeowners who want to replace a damaged pipe section quickly.
These fittings work on copper pipe, PEX, and CPVC, provided you verify the exact pipe diameter. A fitting labeled 1/2″ will not seal on a pipe that measures 1/2″ outside diameter but is actually a different standard.
The repair process:
- Cut out the damaged section with a pipe cutter. Make both cuts straight and square.
- Deburr the remaining pipe ends. Remove any sharp edges, burrs, or markings that could damage the o-ring inside the fitting.
- Mark the insertion depth on each pipe end using the manufacturer’s depth gauge or instructions (usually printed on the fitting package).
- Push the fitting straight onto the pipe until it reaches the depth mark. You should feel a slight click or resistance. Pull back gently to confirm it is locked.
- Repeat on the other side using either a second fitting or a push-fit coupling with a replacement pipe segment.
Test the repair by slowly turning water back on and watching for drips under full water pressure. Even with a successful push-fit repair, having Ready Rooter Washington inspect the broader plumbing system is wise. The forces that caused one section to burst may have weakened other areas.
Special Considerations for PEX and PVC Burst Pipes
Plastic pipes behave differently than copper when they crack or burst. PEX tends to split along its length rather than shatter. PVC and CPVC can crack cleanly but also fragment if struck or frozen.
PEX repairs: Cut out the damaged section. Use crimp rings, clamp rings, or push-to-connect couplings with fittings rated for PEX. Make sure the fitting type matches your PEX variety (PEX-A, PEX-B). Expansion fittings designed for PEX-A will not work with PEX-B pipe.
PVC and CPVC repairs: Cut out the damaged section. Dry-fit the replacement pipe and fittings to confirm alignment. Apply primer (color-coded purple for visibility) to all mating surfaces, then apply solvent cement. Hold each joint steady for 15 to 30 seconds. Allow the full cure time printed on the cement container before restoring pressure.
Plastic pipes are sensitive to UV light and mechanical impact. If the repaired section runs through a garage, crawlspace, or other exposed area, install protective shielding or insulation over it. For hot water lines, use only CPVC pipe and fittings rated for the correct temperature; standard PVC is not rated for hot water and will soften and fail.
Temporary Fixes: When (and How) to Use Duct Tape
Duct tape is a last resort for burst pipe repair. It may slow a small leak in a low-pressure situation, but it will not hold against full household water pressure, which typically runs 60 to 75 psi in Seattle-area homes.
If duct tape is all you have:
- Dry the pipe surface as thoroughly as possible.
- Wrap multiple overlapping layers tightly around the crack, extending several inches past the damage in both directions.
- If you have a piece of rubber sheeting, place it over the crack first, then wrap the tape over it. Adding hose clamps over the rubber and tape creates a stronger temporary patch.
Even with a well-wrapped patch, keep the main valve closed if the burst was severe. The tape will buy you hours, not days. Call emergency plumbing services immediately and do not rely on this fix overnight.
Cleaning Up Water and Preventing Mold After a Burst Pipe
Fast cleanup is almost as important as stopping the water. Immediate cleanup includes mopping up standing water to prevent mold growth. Here is how to handle the aftermath:
- Remove standing water. Use towels or a wet dry vacuum to remove standing water as fast as possible. For larger floods, a submersible pump helps. Target the first 24 to 48 hours; after that, structural materials begin absorbing moisture that becomes very difficult to extract.
- Dry the space aggressively. Run fans and dehumidifiers around the clock. Open windows when weather allows to improve airflow. Remove soaked rugs, carpet padding, and drywall sections that are swollen or crumbling.
- Watch for mold. Mold growth can begin within 48 hours on damp drywall, wood, and carpet. Monitor for musty odors or visible discoloration over the following week. If mold appears or the flooded area exceeds a room’s worth of space, call a water damage restoration company.
- Document everything. Document damage with photos for insurance claims. Photograph the damaged pipe, the water path, affected belongings, and any structural damage before, during, and after cleanup. Video is even better.
When to Call Emergency Plumbing Services (and What to Expect)
Some burst pipe situations are beyond DIY. Calling a plumber is recommended if the break is in a hard-to-reach location, inside a wall, or underground.
Red flags that require a professional plumber immediately:
- Water pouring from ceilings or behind walls
- A burst main water service line (water flowing at the meter or curb)
- Repeated tripping of electrical breakers from water contact
- Inability to locate the damaged pipe
- Multiple leaks appearing at once
Emergency plumbing services are crucial to prevent extensive damage. Licensed plumbers respond to burst pipe emergencies 24/7. Ready Rooter Washington dispatches a licensed plumber to Bellevue, Redmond, Renton, Kent, and the wider Puget Sound area on a 24/7 basis.
What happens when the technician arrives:
- Confirms the water supply is off and the area is safe.
- Locates the burst using visual inspection, moisture meters, or camera pipe inspection for hidden breaks.
- Assesses the damaged section and determines whether a spot repair or a larger replacement is needed.
- Completes the repair using soldered copper joints, press fittings, PEX connections, or approved mechanical couplings, depending on the pipe material.
- Pressure tests the system before fully restoring water service.
Technicians arrive in fully stocked trucks prepared to repair copper pipe, PEX, PVC, or main water service lines on the same visit whenever parts access and conditions allow.
How Ready Rooter Washington Repairs Burst Pipes Professionally
Ready Rooter Washington begins every job with a thorough inspection. For suspected hidden damage in drain or sewer lines, this includes camera pipe inspection to pinpoint the exact location and extent of the problem. Professional plumbers use advanced leak detection tools to find failures behind walls, under slabs, and underground without unnecessary demolition.
The repair approach depends on the pipe material, location, and severity:
- Copper lines: Cut out the failed segment, install a replacement pipe with soldered joints or press-connect fittings that comply with Seattle Plumbing Code requirements (ASTM B32 solder, ASTM B813 flux).
- PEX or CPVC lines: Replace with matching material using crimp, clamp, or push-fit connections.
- Main water service lines: Trenchless replacement methods when appropriate, minimizing yard and driveway disruption.
After every repair, technicians pressure test the system to confirm integrity before restoring water service. Ready Rooter Washington is 5-star rated and award-winning, focused on honest, long-term solutions rather than quick patches. Finding a quality, honest contractor saves you money and future problems.
Dealing With Frozen Pipes Before They Burst
Preventing a burst is easier and cheaper than repairing one, especially during freezing temperatures.
How to identify frozen pipes:
- No water flow from a specific faucet or group of faucets while others work normally
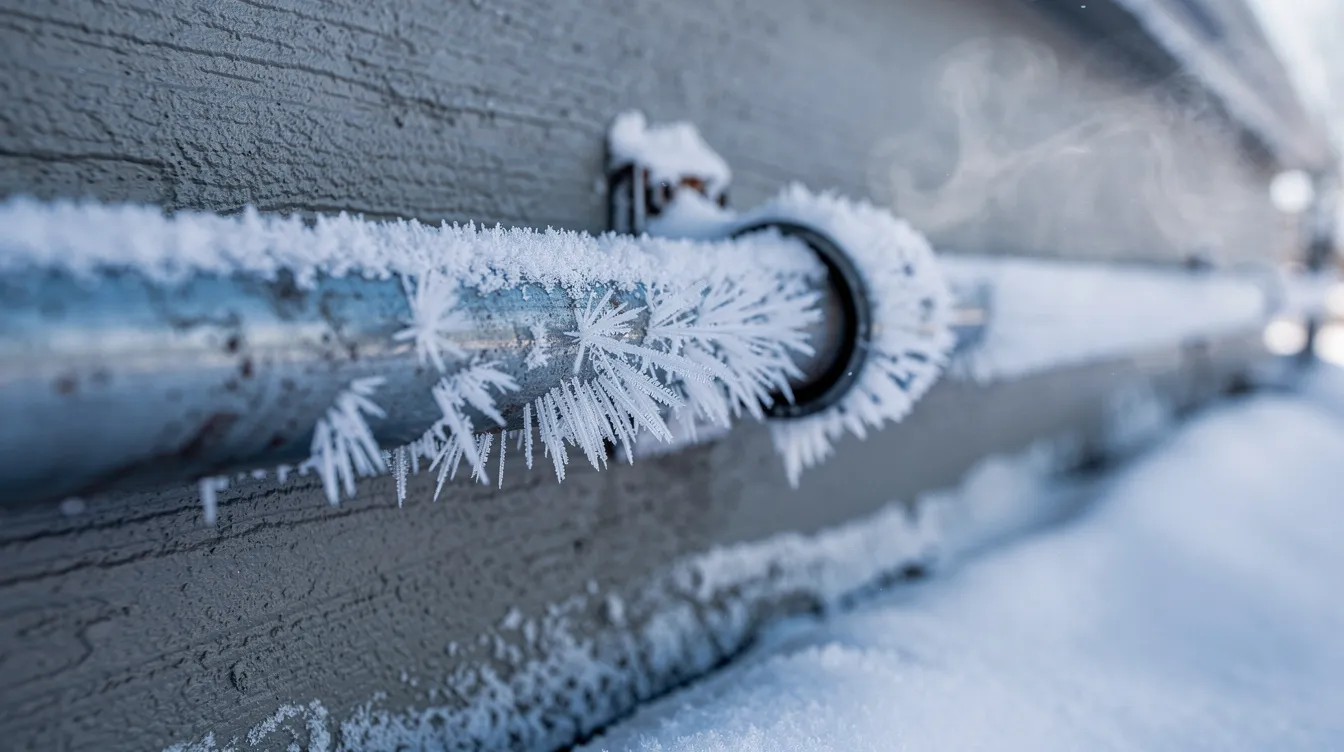
- Visible frost on exposed pipe surfaces
- Bulging or slightly deformed sections in unheated areas like garages or crawlspaces
Safe thawing methods:
- Open the affected faucet slightly so melting water can flow and relieve pressure
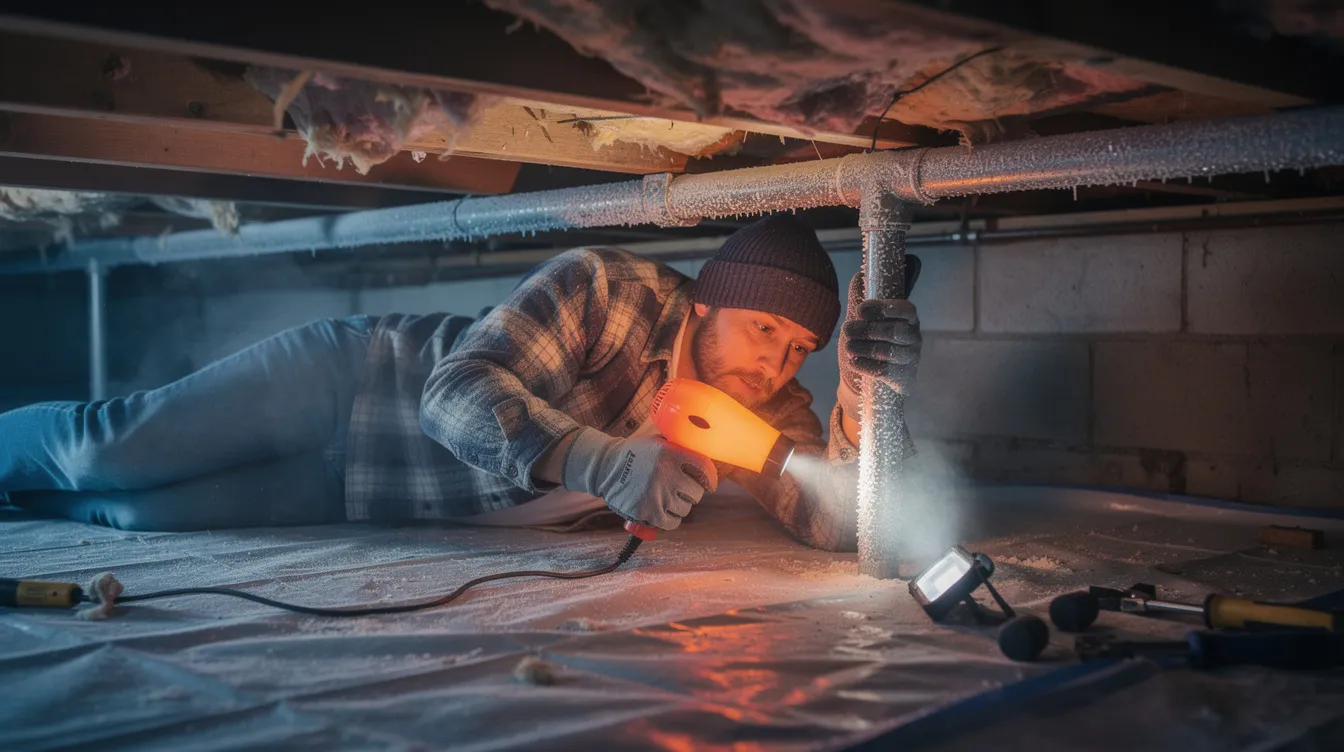
- Use a hair dryer, heat lamp, or portable space heater aimed at the frozen section
- Wrap the pipe in towels soaked in warm water, replacing them as they cool
Do not use open flames, propane torches, or high-heat devices directly on frozen pipes. The fire risk is real, and rapid thermal shock can crack the pipe at the point of heating.
If a frozen pipe is hidden in a wall or attic, or if you see any sign of cracking or a leak as it thaws, call Ready Rooter Washington to contact their 24/7 drain and sewer team in Bellevue before the situation escalates from a freeze to a flood.
Long-Term Prevention: How to Avoid Burst Pipes in the Future
A few targeted upgrades reduce burst pipe risk across the seasons.
Insulate pipes. Foam sleeves or fiberglass wrap on exposed pipes in crawlspaces, attics, garages, and along exterior walls cost a few dollars per linear foot and prevent freeze damage. Focus on vulnerable areas where pipes run near exterior walls or through unheated areas.
Install or check a pressure reducing valve. Seattle code requires a PRV when static pressure exceeds 80 psi. Even below that threshold, setting household pressure to 50 to 60 psi extends the life of every joint, valve, and fixture in the system. A PRV installation in the Seattle area typically costs $350 to $700.
Schedule periodic inspections. For older homes with original copper pipe or galvanized steel, a plumbing inspection every few years can catch corrosion, scaling, or joint deterioration before it becomes a burst. Ready Rooter Washington offers these inspections across Bellevue and Greater Seattle.
Consider whole house repiping. If your home has had multiple leaks, corroded copper, or galvanized plumbing, replacing the entire supply system with modern PEX or copper eliminates the cycle of patch-and-pray. Trenchless water line replacement handles the underground main water service with minimal excavation.
Monitor your water bill. A sudden increase with no change in usage patterns often signals a hidden leak that could become a burst if left unchecked.
Working With Insurance After a Burst Water Pipe
This section covers typical considerations; it is not legal advice. Review your specific policy language or speak with your agent for exact coverage details.
- Report the incident promptly. Contact your insurance company as soon as safely possible after a burst pipe. Most carriers have 24/7 claims lines.
- Document everything before cleanup. Take detailed photos and videos of the damaged area, personal property, and the broken pipe itself. Document damage with photos for insurance claims before major cleanup begins.
- Understand coverage limits. In Washington State, standard homeowner policies generally cover “sudden and accidental” water damage, such as a burst pipe. Long-term slow leaks, neglect, and lack of heat during freezes are commonly excluded. Mold damage may or may not be covered depending on policy language and whether the mold resulted directly from the covered burst event.
- Watch for vacancy exclusions. If a building has been vacant for 60 days or more, many policies suspend water damage coverage. A Washington State court case upheld this exclusion based on policy wording.
- Get professional documentation. Ready Rooter Washington provides invoices, descriptions of the damaged section, and repair documentation to support claims.
Related Services Ready Rooter Washington Can Provide
A burst pipe often reveals or coexists with other plumbing problems. These related services address the full picture:
- Drain cleaning and hydro-jetting: If debris or blockages contributed to pressure buildup in drain or sewer lines, clearing them prevents future problems, and professional drain cleaning and clearing in Bellevue, WA ensures clogs are removed safely and thoroughly.
- Trenchless sewer line repair and main water service repair: For properties where underground infrastructure is failing, trenchless sewer line repair in Bellevue, WA replaces pipes without tearing up yards or driveways.
- Whole house repiping: For homes with repeating leaks, corroded pipe, or galvanized plumbing that has reached end of life.
- Water heater inspection or replacement: If the burst damaged or flooded your water heater, a technician can assess whether the unit is safe to operate or needs replacement, and dedicated water heater services in Bellevue, WA can restore hot water safely.
- Sump pump services: Basements and crawlspaces prone to flooding benefit from a working sump pump as a backup against water damage from any source.
DIY vs Professional Burst Pipe Repair: How to Decide
Cost, safety, and long-term reliability all factor into the decision.
A small, accessible leak on a visible pipe in a garage or utility room may be DIY-friendly for a homeowner with the right tools and comfort level. The repair process for a simple copper or PEX section can be completed in an afternoon with parts from a hardware store.
Using a plumber is advisable for severe damage or hidden leaks. Hidden bursts inside walls, extensive flooding, structural damage, or any uncertainty about building codes all call for a licensed plumber. Improper repairs can lead to further damage, mold problems, or denied insurance claims if work does not meet code. Washington State requires licensed plumbers for major repairs or permanent pipe replacement.
Even if you have applied a temporary fix, scheduling a professional assessment with Ready Rooter Washington confirms the repair is sound and that no other sections were weakened by the same forces that caused the original burst.
Choosing a Reliable Burst Pipe Plumber in Greater Seattle
Selecting the right contractor during such emergencies matters more than most homeowners realize. A poor repair creates a second emergency weeks or months later.
- Verify licensing. Washington State requires plumbers to be licensed, bonded, and insured. Ask for the license number and verify it before work begins.
- Read recent reviews. Look for consistent 5-star ratings and local awards. Patterns in reviews (response time, honesty, cleanup quality) tell you more than a single testimonial.
- Ask about pricing and warranties. Upfront pricing, clear scope of work, and warranties on parts and labor separate trustworthy contractors from those who pad invoices.
- Confirm emergency response time. A plumber who cannot arrive within a couple of hours during a burst pipe event is not set up for emergency plumbing.
Ready Rooter Washington checks all of these boxes. The company is 5-star rated and award-winning, with a focus on integrity, clear communication, and long-term solutions that minimize damage and save you money over time as a top plumbing, drain, and sewer company in Bellevue, WA. Visit readyrooter4you.com or call to schedule service.
FAQ: Burst Pipe Repair in Bellevue & Puget Sound
How long does it take a plumber to fix a burst pipe?
Most burst pipe repairs take 2 to 4 hours to complete for a single exposed copper or PEX line, from arrival through pressure testing and turning the water back on. Complex jobs involving multiple burst pipes, hidden leaks inside walls, or a damaged main water service line may take most of a day or require a follow-up visit. Repairs typically restore water service within 12 hours, even for more involved work. Ready Rooter Washington aims for same-day restoration whenever parts and site conditions allow.
Will my homeowner’s insurance cover a burst pipe in Washington State?
Many standard policies cover sudden and accidental burst pipe damage. Long-term slow leaks, pre-existing corrosion, and damage caused by failure to heat the home during cold weather are commonly excluded. Check your specific policy wording and speak with your agent for exact coverage. Providing photos, videos, and detailed invoices from a licensed plumber like Ready Rooter Washington helps streamline the claims process.
Can I leave a temporary duct tape or epoxy repair in place long-term?
No. Temporary repairs are not designed for long-term use and can fail without warning, causing renewed flooding and serious damage. Schedule a permanent burst pipe repair as soon as possible, ideally within 24 to 48 hours. A code-compliant permanent repair protects both the home and your potential insurance coverage; makeshift fixes do neither.
How can I tell if an outdoor underground pipe has burst?
Look for unexplained wet spots in the yard, constantly soggy soil, or water flowing into the street near your property line. A spinning water meter dial when all indoor faucets and appliances are off is another strong indicator of a hidden leak. Ready Rooter Washington can perform leak detection and main water service repair, including trenchless methods that avoid digging up landscaping when appropriate.
What temperature should I keep my home at to prevent frozen and burst pipes?
Keep indoor temperature at or above about 55°F (13°C) during cold snaps, even when you are away from home. Open cabinet doors under sinks on exterior walls during freezing weather to let warm air circulate around pipes. Adding pipe insulation and sealing cold drafts in crawlspaces and garages further reduces burst pipe risk. These preventative measures cost far less than a single water damage restoration event, which runs $500 to $7,000 or more in the Bellevue area depending on severity.
Share this post:


